Creating a Custom Block
Table of Contents
Now that Custom Blocks appear to be rendering (thank you mochott for the quick fix), we decided to try our hand at making our first custom block, which you can now find in the Block Marketplace. So, let's dig into the process.
Create Your Own Block
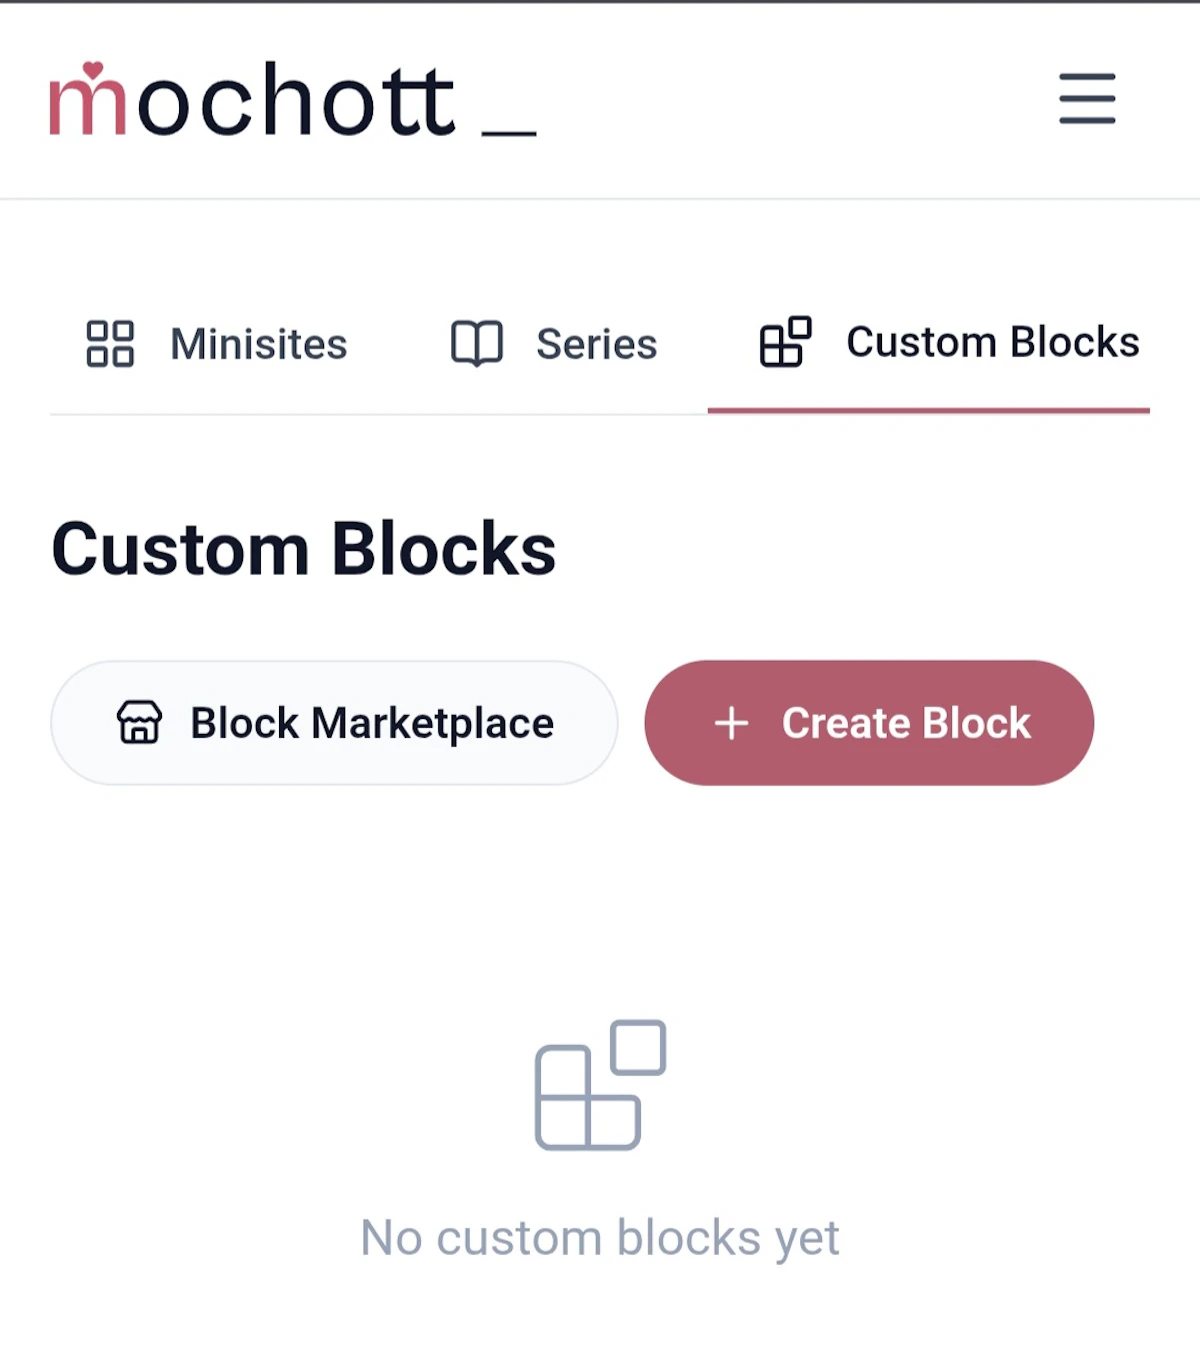
You'll start at the Custom Blocks option in your dashboard. Then, you'll click “Create Block”.
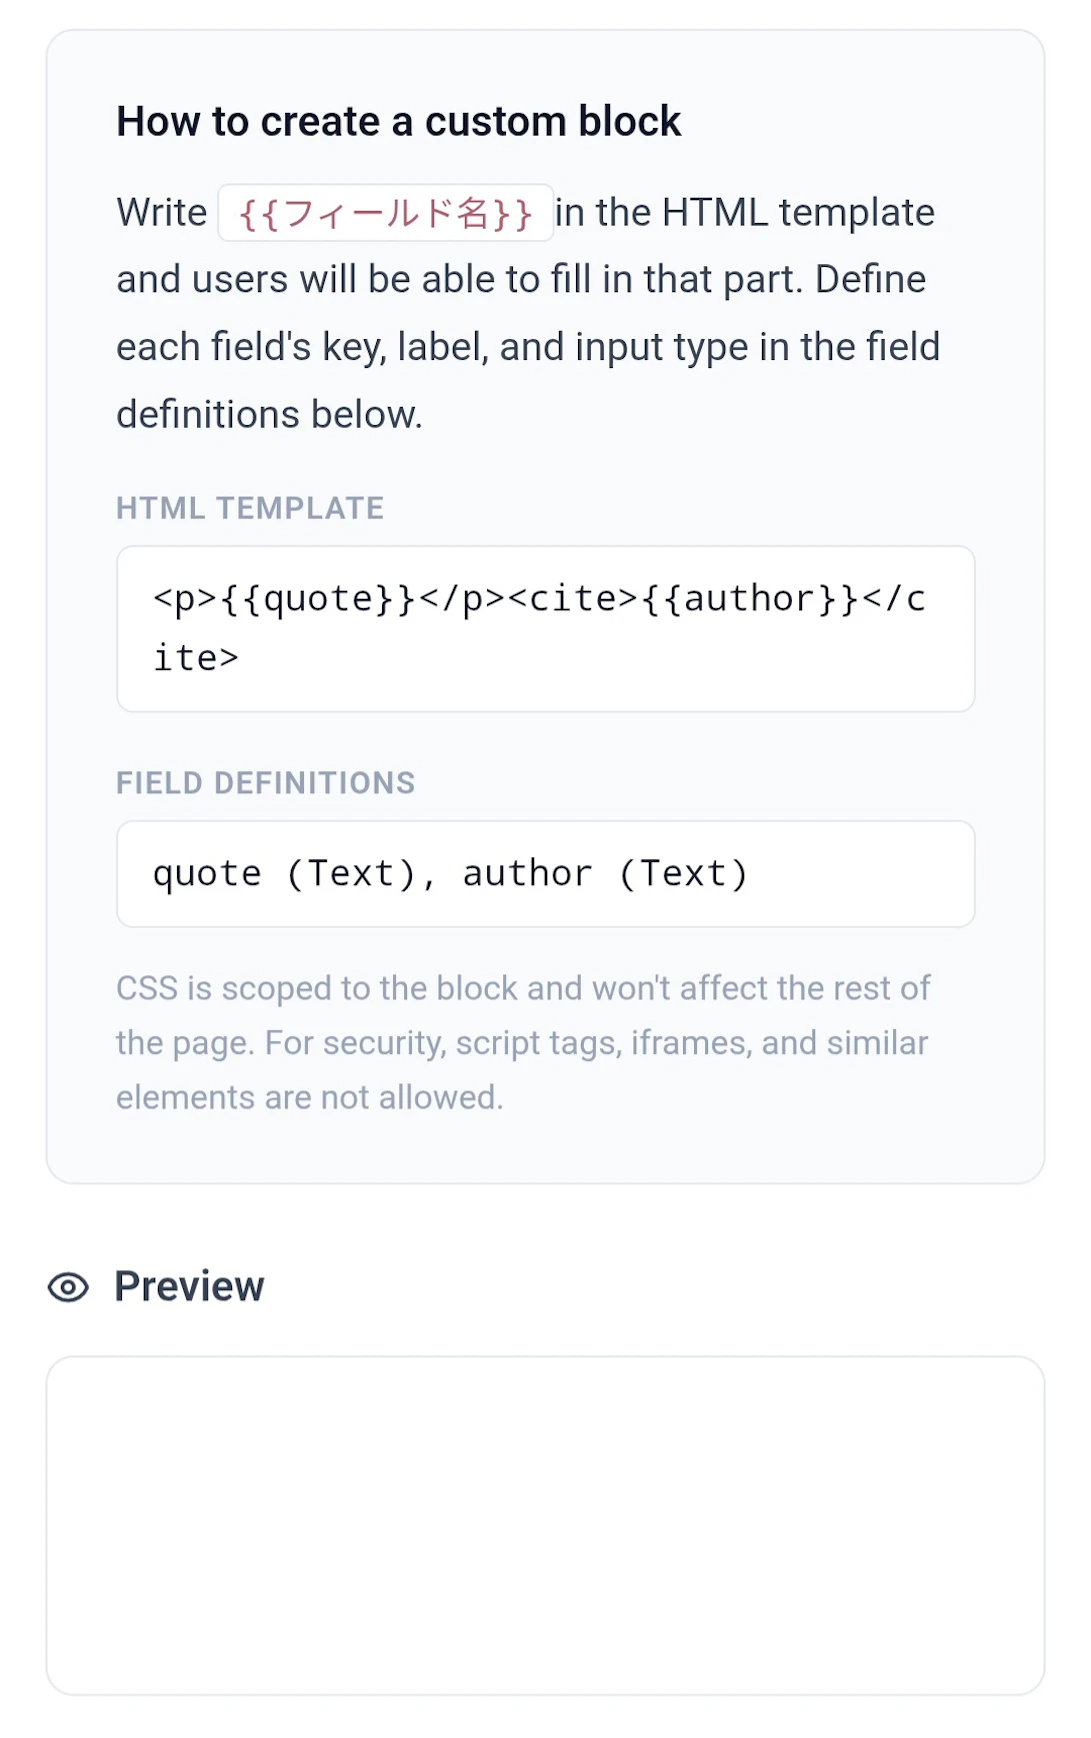
You get a quick rundown of how to create your block and a little example of how it works. I did not find this to be useful at all and just kinda leaned into my intuition to create my block.
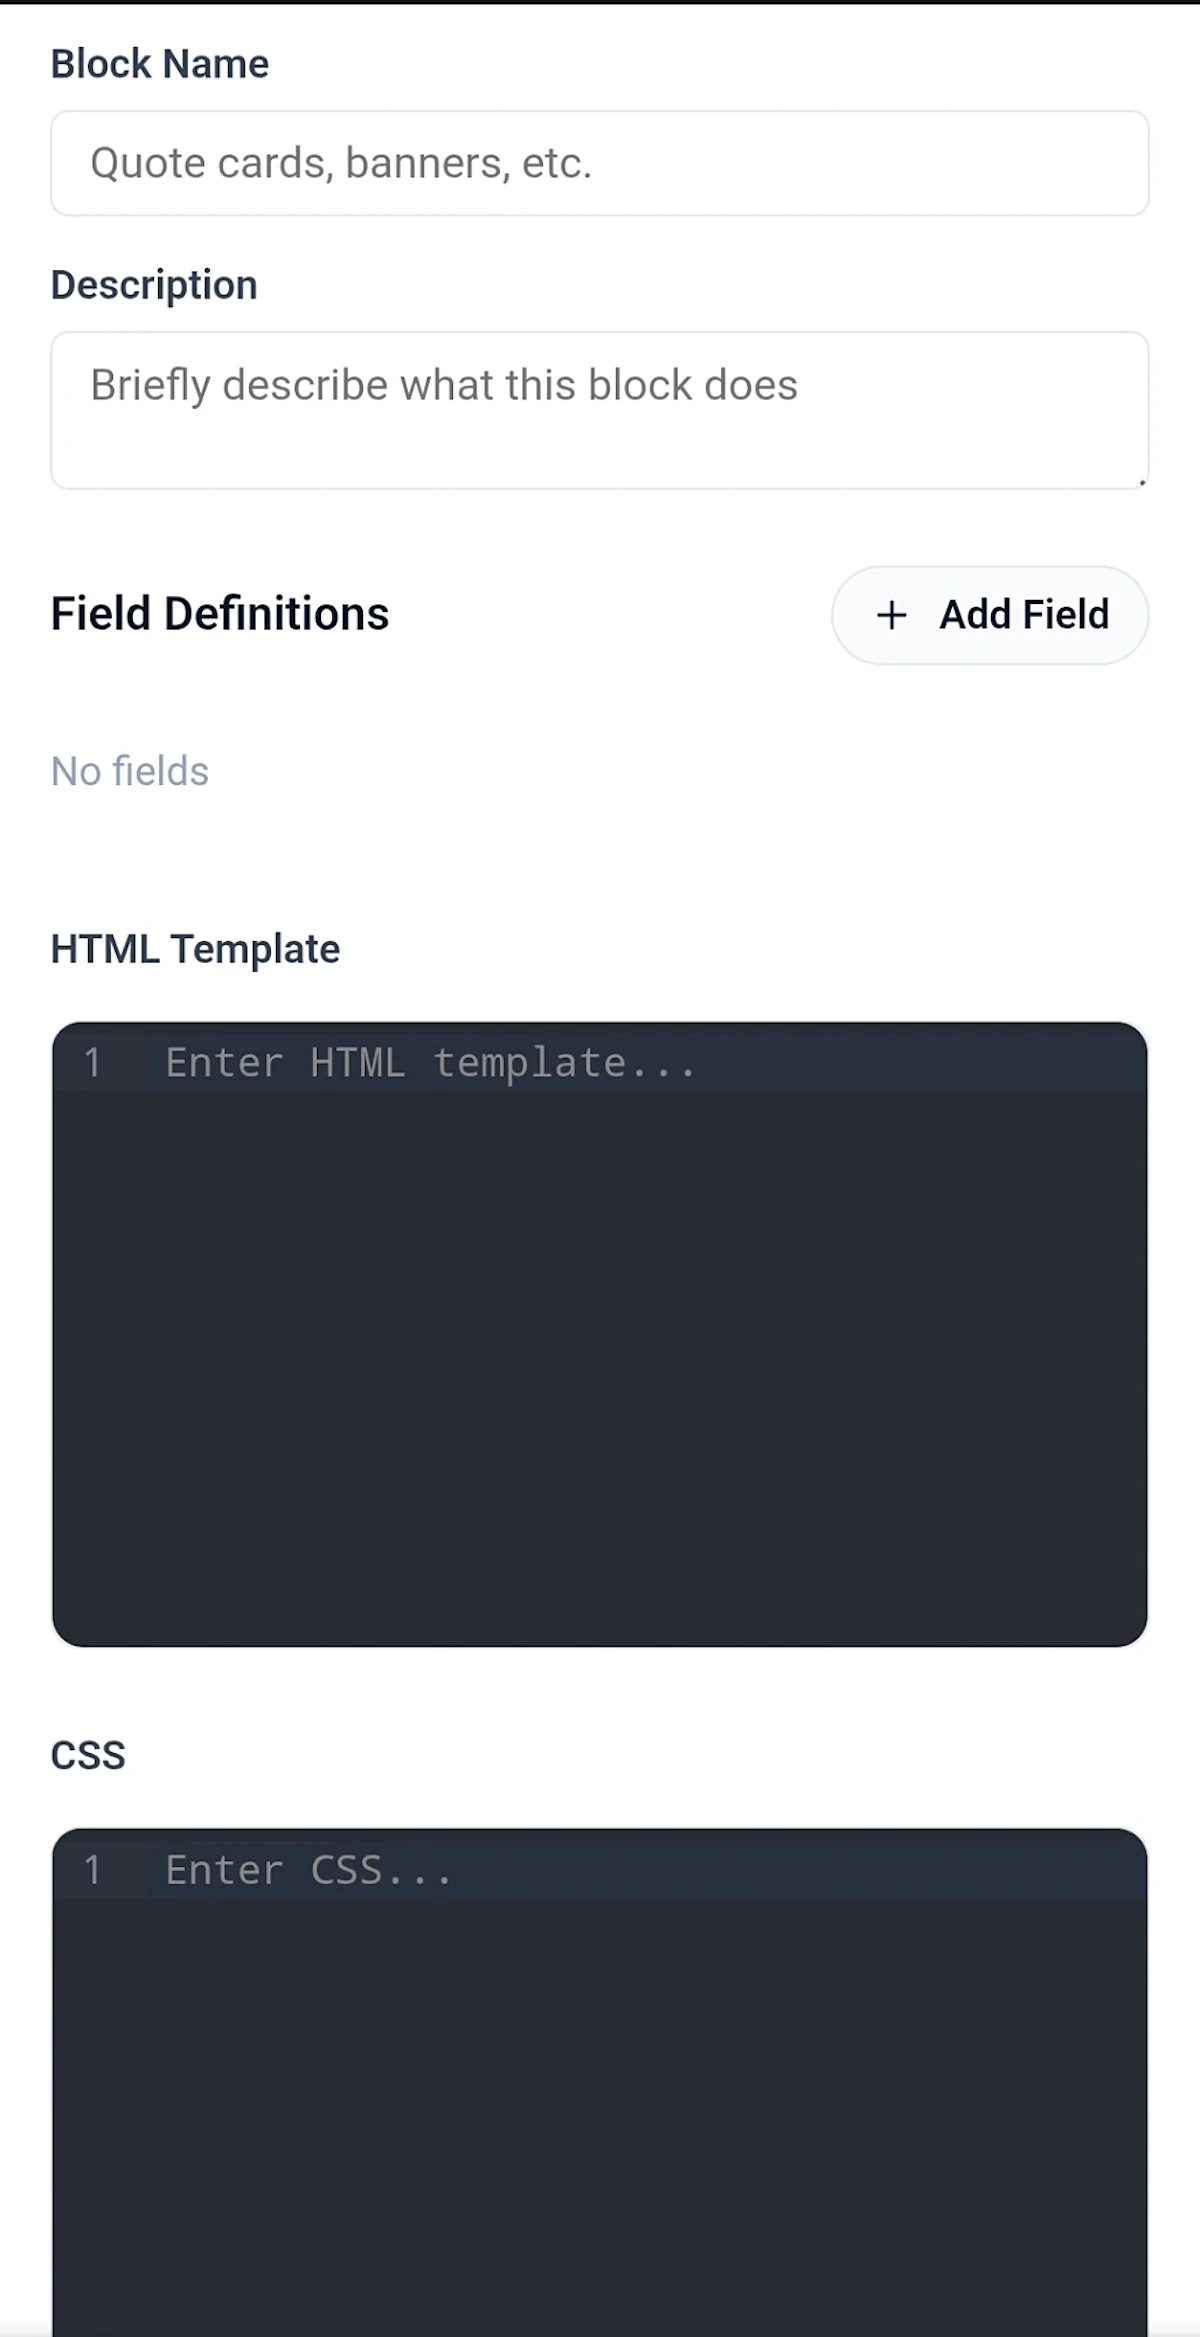
Luckily, once you get into the actual editor part of this page, it makes more sense. What you write in the “Block Name” and “Description” section is what shows up in the Block Marketplace.
The fields you create are where users are going to input their own information. There are quite a few options that you can pick when adding fields, which include:
Text
Text Area
Color
Image URL
URL
Number
Select (Drop Down)
Switch (Check Box)
The HTML and CSS boxes will allow you to choose how all this information will render on a user's blog. It sounds really complicated, we know, but we'll show you what we did and how.
The “Currents” Block
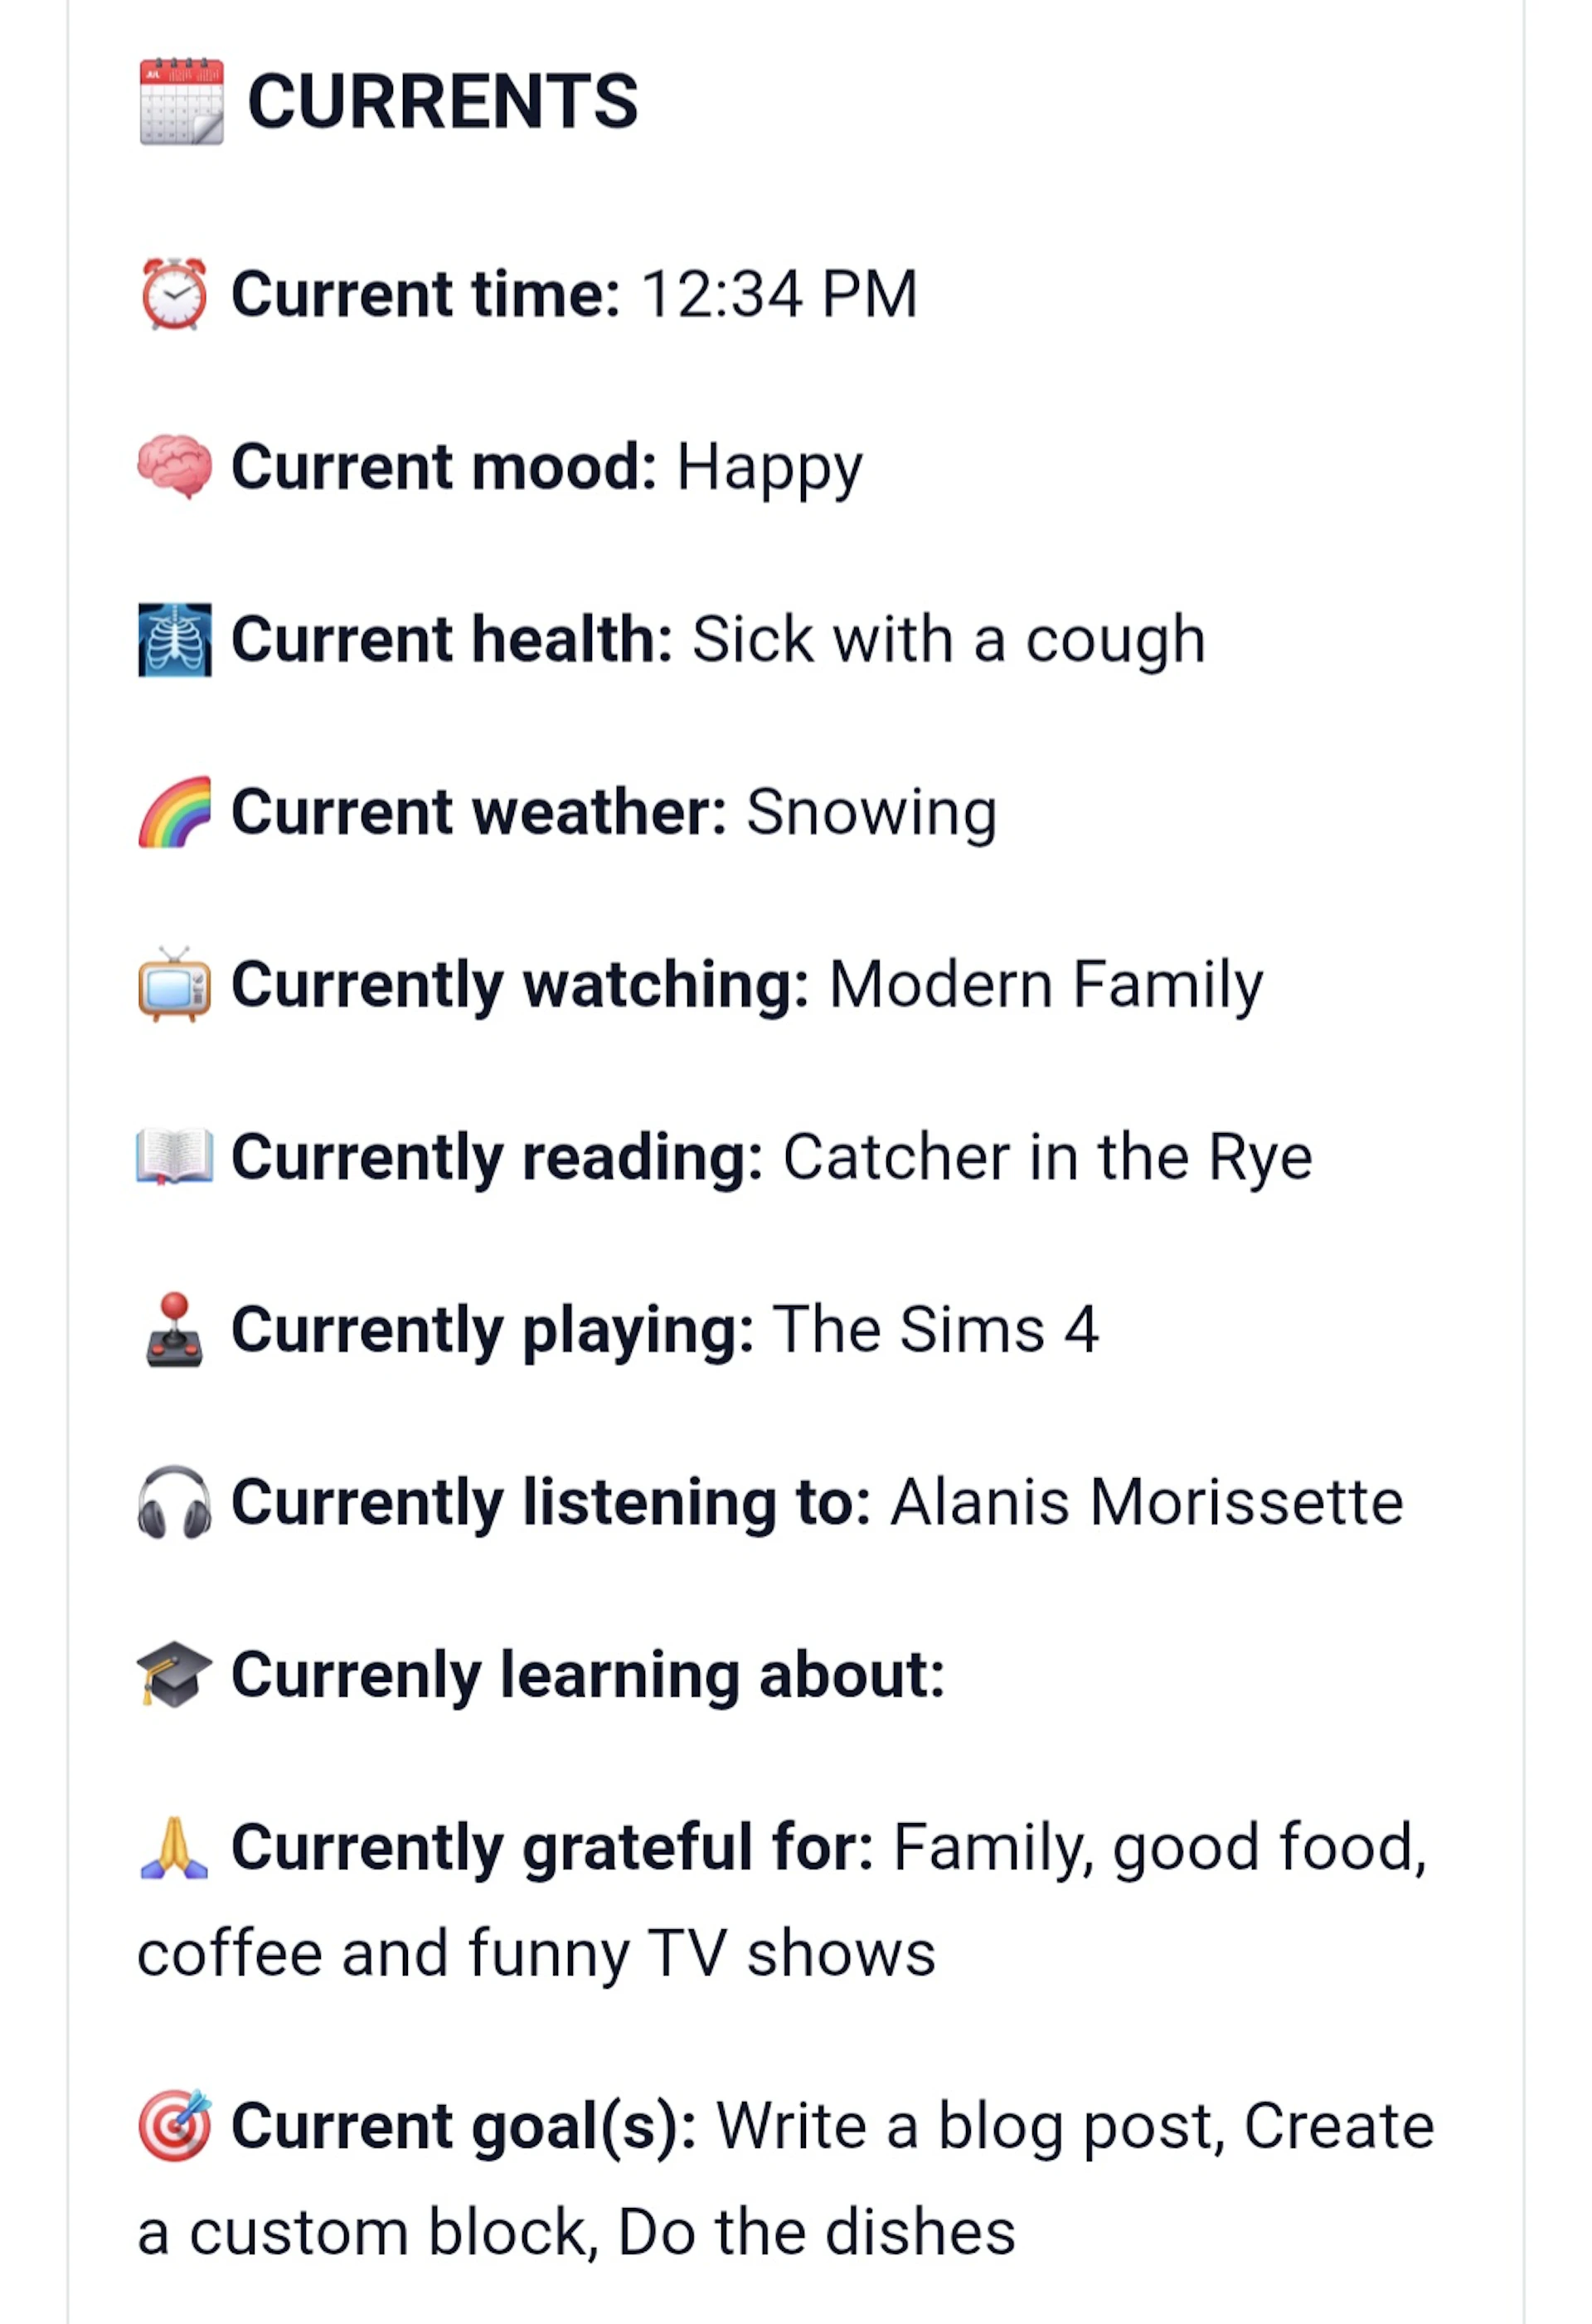
We decided to create a block that would let you track some random things about your day. We think this is perfect for those of you who are keeping diaries/journals on mochott. Here's our block in action:
We've left all the default fields as is but you can change the text for all of these. Sadly, you can't delete the options you don't want but you can leave them blank. For example, you could:
So, let's walk through the process of creating this. We kept it really simple and only used the “Text” option in our fields and we also kept the HTML really simple. We did not play with CSS at all.
Step 1: Metadata & Fields

We decided to call this block “Currents”, as in what you're currently experiencing. We hope our description gives enough details to make it obvious what this block does.
Next, you're gonna add your fields. So, let's look at what each section here does:
Key - this is what you'll add in your HTML to render the field on a user's blog. If this doesn't make sense, stay tuned to the next step.
Label - this is the text label that will essentially tell user's what to write when they select your custom block.
Type - this is the type of fields available that we mentioned above (text, URL, drop down, etc.)
Default Value - you don't need to fill this out, although I did find it useful when testing my block to see how it would all look.
Required - you can make your fields required to be filled out, although we didn't experiment with this for our “Currents” block.
There seems to be no limit to the number of fields you can create. In total for our “Currents” block, we used 11 fields.
Step 2: HTML
To make your fields show up, you'll need to write some HTML. We kept it really simple here and only used three codes: <h3></h3> for the block title, <p></p> to make a paragraph and <strong></strong> to bold the field labelling. Then we added the field's key in {{}} to make the insertable text show up. Here's the HTML as we wrote it:
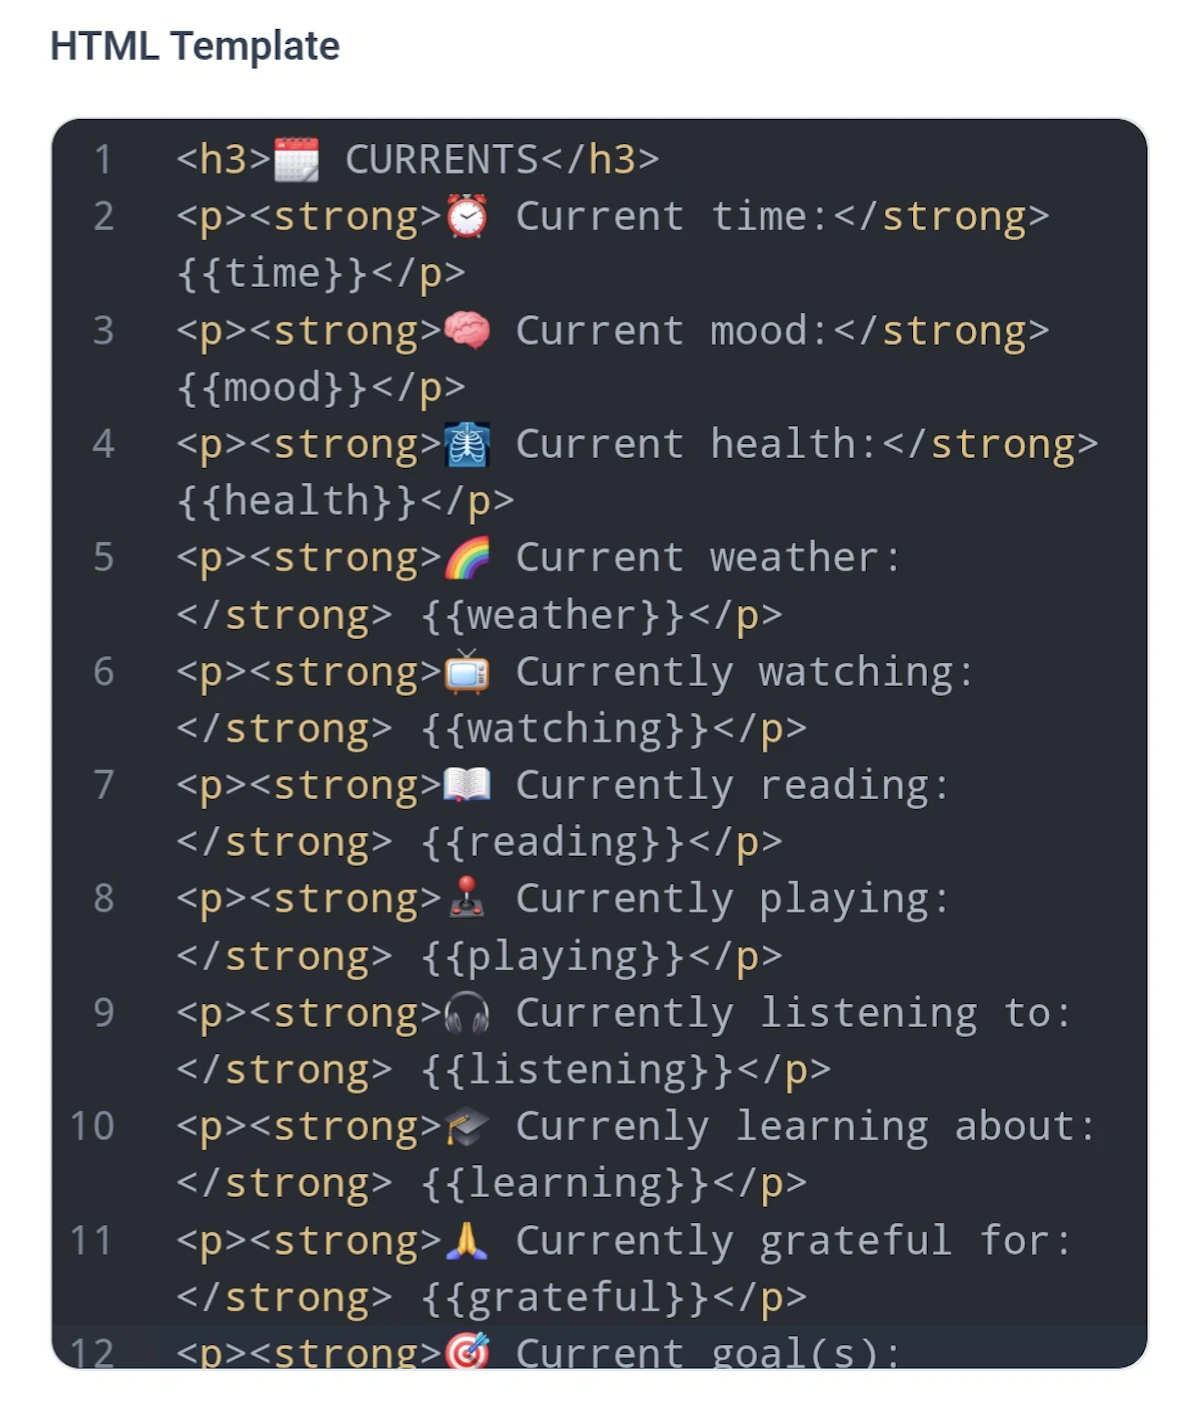
As you can see, the title is wrapped in h3 tags, like so:
<h3>Currents</h3>Then to show each of the fields, we added some intro text and then the field key - so for our “time” field, the HTML looked like:
<p><strong>⏰️ Current time:</strong> {{time}}</p>Step 3: Save & Use
We could've fancied up the whole block with some CSS, but we wanted to keep things unbelievably simple. Once you save your block, it's automatically added to the Block Marketplace (which we can't decide if we love or not) and you are able to add it to your blog from your posting interface. Just select the “+”, scroll to Custom Blocks and you'll find yours there.
All in all, we found the process of creating a custom block to be much easier than we were expecting and we're playing with ideas for more blocks that we can create. We'd love to see your blocks or even play with the ideas you might have.
It would be cool in the future to be able to see who's used your blocks or what they end up looking like on other people's blogs. Super minor details though.
Custom Blocks
- 1 An Intro to Custom Blocks
- 2 Creating a Custom Block This article